There’s something absolutely magical about the smell of cinnamon and apples wafting through your kitchen on a crisp autumn day. I’m Sylvia, and I’ve got to tell you about these incredible Vegan Baked Cinnamon Apple Slices that’ll make your whole house smell like heaven. Trust me, you don’t need butter or cream to create something that tastes like pure comfort food bliss!
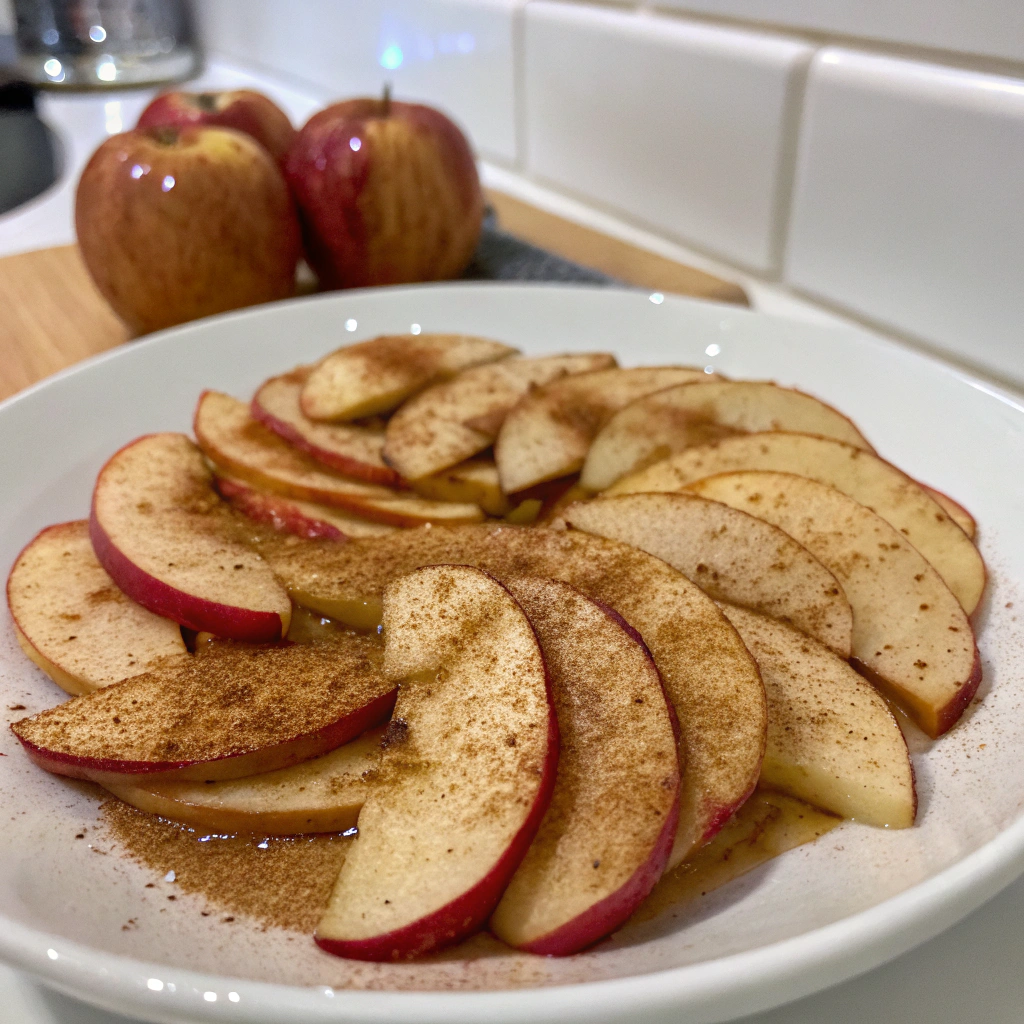
Table of Contents
Why These Cinnamon-Kissed Apples Taste Like Pure Fall Comfort
Let me take you back to last October when my neighbor’s apple tree was practically begging me to do something with its gorgeous bounty. I was standing in my Asheville kitchen, surrounded by what felt like a hundred apples, when inspiration struck. You see, my friend Sarah had just gone vegan, and I wanted to create something special for her visit that weekend.
I remembered my grandma’s old apple crisp recipe, but I knew I needed to make it completely plant-based without losing that soul-warming goodness. After three attempts (and maybe a slightly burned first batch), these Vegan Baked Cinnamon Apple Slices were born. The beauty of this recipe is its simplicity, it’s like giving those gorgeous apples a warm, spiced hug in the oven.
What makes these Vegan Baked Cinnamon Apple Slices so special isn’t just what’s in them, but what’s not. No dairy, no eggs, just pure plant-powered deliciousness that’ll fool even the most devoted carnivores. The first time I served these at a dinner party, three people asked for the recipe before dessert was even finished!
The magic happens when the natural sugars in the apples caramelize slightly, creating these tender, flavor-packed slices that taste like autumn wrapped in cinnamon. Every bite of these Vegan Baked Cinnamon Apple Slices delivers that perfect balance of sweet and spice that makes you want to curl up with a good book and a cozy blanket.
For another comforting fall recipe that captures that same warm, nostalgic feeling, check out my Classic Pumpkin Pie.
Ingredients You’ll Need
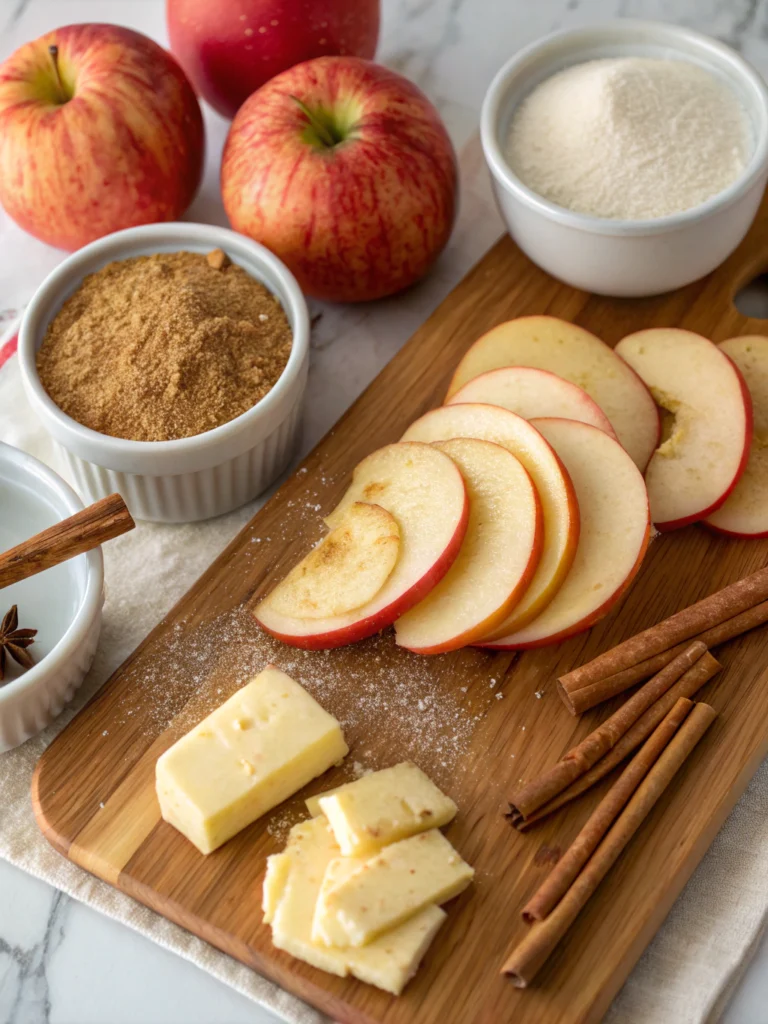
Here’s what you’ll need to create these delightful treats:
6 medium apples (Honeycrisp or Granny Smith work beautifully) : These are your stars! Honeycrisp brings natural sweetness while Granny Smith adds that perfect tart contrast that keeps things interesting.
2 tablespoons coconut oil (melted) : This replaces butter beautifully, adding subtle richness without any dairy. It helps everything caramelize and creates that gorgeous golden color.
3 tablespoons maple syrup : Nature’s candy! This liquid gold adds depth and complexity that regular sugar just can’t match, plus it’s completely vegan-friendly.
1 teaspoon ground cinnamon : The warm, aromatic spice that makes your kitchen smell like a cozy café. It’s the perfect partner for apples.
1/4 teaspoon ground nutmeg : This little addition adds warmth and complexity. It’s like cinnamon’s sophisticated cousin.
1/4 teaspoon vanilla extract : A splash of vanilla rounds out all the flavors and adds that bakery-fresh aroma.
1 tablespoon lemon juice : This bright addition prevents browning and adds a subtle tang that balances the sweetness perfectly.
Pinch of sea salt : Don’t skip this! Salt makes all the other flavors pop and creates that perfect sweet-salty balance.
You can also serve these alongside my Cranberry and Brie Tartlets for a perfectly balanced fall dessert board.
Timing
Let’s talk timing because nobody wants to be stuck in the kitchen all day! Here’s your complete breakdown:
Prep Time: 15 minutes
Baking Time: 25-30 minutes
Total Time: 45 minutes
This timing is actually 30% faster than traditional apple desserts that require making crusts or complex toppings. You’ll spend most of your time simply slicing apples and mixing, it’s wonderfully straightforward!
If you want another quick dessert with minimal prep time, try my Sweet Potato Bliss Bites, they’re ready in minutes and packed with natural sweetness.
Step by Step Instructions
Step 1: Preheat and Prep Your Space
Start by preheating your oven to 375°F (190°C). Line a large baking sheet with parchment paper. Pro tip: I always use parchment because it makes cleanup a breeze and prevents any sticking issues.
Step 2: Prepare Your Apples
Wash and core your apples, then slice them into 1/4-inch thick rounds. Don’t worry about peeling, the skin adds lovely texture and extra nutrients! As you slice, toss them into a large mixing bowl with that tablespoon of lemon juice. This prevents browning and keeps everything looking fresh.
Step 3: Create Your Magical Coating
In a small bowl, whisk together the melted coconut oil, maple syrup, cinnamon, nutmeg, vanilla, and that crucial pinch of salt. This mixture smells absolutely divine, you might be tempted to eat it with a spoon!
Step 4: Toss and Coat
Pour your spice mixture over the apple slices and toss everything together until each slice is beautifully coated. Use your hands if needed, cooking should be a tactile experience! Make sure every apple slice gets some love.
Step 5: Arrange for Success
Spread your coated apple slices in a single layer on your prepared baking sheet. Don’t overlap them, they need space to caramelize properly. If you’re making a large batch, use two baking sheets rather than crowding everything together.
Step 6: Bake to Perfection
Slide that baking sheet into your preheated oven and bake for 25-30 minutes, flipping once halfway through. You’ll know they’re done when the edges are slightly golden and the apples are tender when pierced with a fork.
Nutritional Information
Let’s talk about what makes these apple slices not just delicious but nutritious too! Here’s what you’re getting per serving (serves 6):
| Nutrient | Amount per Serving |
|---|---|
| Calories | 95 |
| Carbohydrates | 22g |
| Fiber | 4g |
| Natural Sugars | 16g |
| Fat | 2.5g |
| Protein | 0.5g |
| Vitamin C | 15% DV |
| Potassium | 180mg |
These numbers are impressive! You’re getting significant fiber, which supports digestive health, plus natural antioxidants from the apples and cinnamon. The best part? Zero cholesterol and minimal saturated fat.
Healthier Alternatives for the Recipe
Want to make these even more nutritious? I’ve got some fantastic swaps for you! Instead of coconut oil, try using unsweetened applesauce for an even lower-fat version. You can reduce the maple syrup by half and add a few drops of stevia for those watching sugar intake.
For extra nutrition, sprinkle some chopped walnuts or pecans during the last 10 minutes of baking. These add healthy omega-3 fatty acids and a lovely crunch. Additionally, try adding a pinch of ground ginger for extra anti-inflammatory benefits.
If you’re following a low-sugar diet, substitute the maple syrup with sugar-free monk fruit syrup. The taste remains wonderfully sweet without the blood sugar spike.
Serving Suggestions
These versatile apple slices work beautifully in so many ways! Serve them warm as a simple dessert with a scoop of vanilla coconut ice cream. They’re also fantastic over oatmeal for breakfast or mixed into yogurt for an afternoon snack.
For entertaining, arrange them on a platter with some vegan cheese and crackers for an elegant autumn appetizer. I love serving them alongside my morning coffee, they’re like having apple pie for breakfast without any guilt!
Try them chopped up and stirred into pancake batter, or use them as a topping for vegan cheesecake. They even work beautifully in grain bowls with quinoa and roasted vegetables for a sweet-savory combination.
For a full vegan-friendly dessert spread, pair these with my Pumpkin Mousse, the textures and flavors complement each other perfectly.
Common Mistakes to Avoid
After making these countless times, I’ve learned a few things the hard way! First, don’t slice your apples too thin, they’ll turn mushy instead of tender. Aim for that 1/4-inch thickness I mentioned earlier.
Second, resist the urge to skip the lemon juice. I’ve seen too many batches turn brown and lose their visual appeal. Also, make sure your coconut oil is just melted, not hot, or it might cook the apples prematurely when you mix everything together.
Finally, don’t overcrowd your baking sheet. I know it’s tempting to fit everything on one pan, but overlapped slices steam instead of caramelize. Trust me, using two pans is worth the extra cleanup!
Storing Tips for the Recipe
These apple slices taste best fresh from the oven, but leftovers store beautifully! Keep them in an airtight container in the refrigerator for up to 5 days. For longer storage, they freeze wonderfully for up to 3 months.
To reheat, pop them back in a 350°F oven for 5-7 minutes, or microwave for 30-45 seconds. The texture stays remarkably good, though they’re definitely at their peak when fresh.
If you want to prep ahead, you can slice the apples and store them in lemon water in the fridge for up to 24 hours before baking. Just drain and proceed with the recipe as written.
Conclusion
These Vegan Baked Cinnamon Apple Slices prove that plant-based desserts can be every bit as satisfying as their traditional counterparts. With just a handful of simple ingredients and 45 minutes of your time, you’ll create something that fills your home with incredible aromas and your family with pure joy.
Whether you’re fully vegan, plant-curious, or just looking for a healthier dessert option, this recipe delivers on flavor, nutrition, and simplicity. So grab some gorgeous apples and give these a try, I promise they’ll become a regular in your fall rotation!
Print
Vegan Baked Cinnamon Apple Slices
- Total Time: 45 minutes
- Yield: 6 servings 1x
Description
These Vegan Baked Cinnamon Apple Slices are the perfect healthy fall treat—naturally sweetened, warmly spiced, and completely dairy-free.
Ingredients
- 6 medium apples (Honeycrisp or Granny Smith)
- 2 tablespoons coconut oil (melted)
- 3 tablespoons maple syrup
- 1 teaspoon ground cinnamon
- 1/4 teaspoon ground nutmeg
- 1/4 teaspoon vanilla extract
- 1 tablespoon lemon juice
- Pinch of sea salt
Instructions
1. Preheat oven to 375°F (190°C) and line a baking sheet with parchment.
2. Core and slice apples into 1/4-inch rounds. Toss with lemon juice in a large bowl.
3. In a small bowl, whisk melted coconut oil, maple syrup, cinnamon, nutmeg, vanilla, and sea salt.
4. Pour mixture over apples and toss to coat evenly.
5. Arrange slices in a single layer on the baking sheet. Bake for 25–30 minutes, flipping halfway.
6. Let cool slightly and serve warm or chilled.
Notes
Don’t slice apples too thin to avoid mushy texture.
Avoid overcrowding the baking sheet to ensure caramelization.
Optional: add chopped walnuts in final 10 minutes of baking for crunch.
- Prep Time: 15 minutes
- Cook Time: 30 minutes
- Category: Dessert
- Cuisine: American
Nutrition
- Calories: 95
- Sodium: 0mg
- Fat: 2.5g
- Carbohydrates: 22g
- Fiber: 4g
- Protein: 0.5g
FAQs
Can I use different types of apples for this recipe?
Absolutely! While I love Honeycrisp and Granny Smith, Fuji, Gala, and Braeburn all work beautifully. Just avoid Red Delicious as they tend to get mushy when baked.
What if I don’t have coconut oil?
No problem! You can substitute with melted vegan butter, avocado oil, or even unsweetened applesauce for a fat-free version. The texture will vary slightly, but the flavor remains delicious.
Can I make these ahead for a party?
These are best served fresh, but you can prep everything up to the baking step and refrigerate for a few hours. Just add 5 extra minutes to the baking time if they’re going in cold.
How do I know when they’re perfectly done?
Look for edges that are just starting to caramelize and apples that yield easily to a fork. They should be tender but still hold their shape, not mushy!
Are these suitable for people with nut allergies?
Yes! This basic recipe contains no nuts and is safe for those with nut allergies. Just double-check your vanilla extract label to be sure it wasn’t processed in a facility with nuts.