Do you ever crave that perfect balance of cool mint and creamy sweetness? This Homemade Shamrock Shake brings all the magic of your favorite seasonal treat right to your kitchen. Moreover, you’ll discover just how simple it is to create this refreshing masterpiece with ingredients you likely already have on hand.
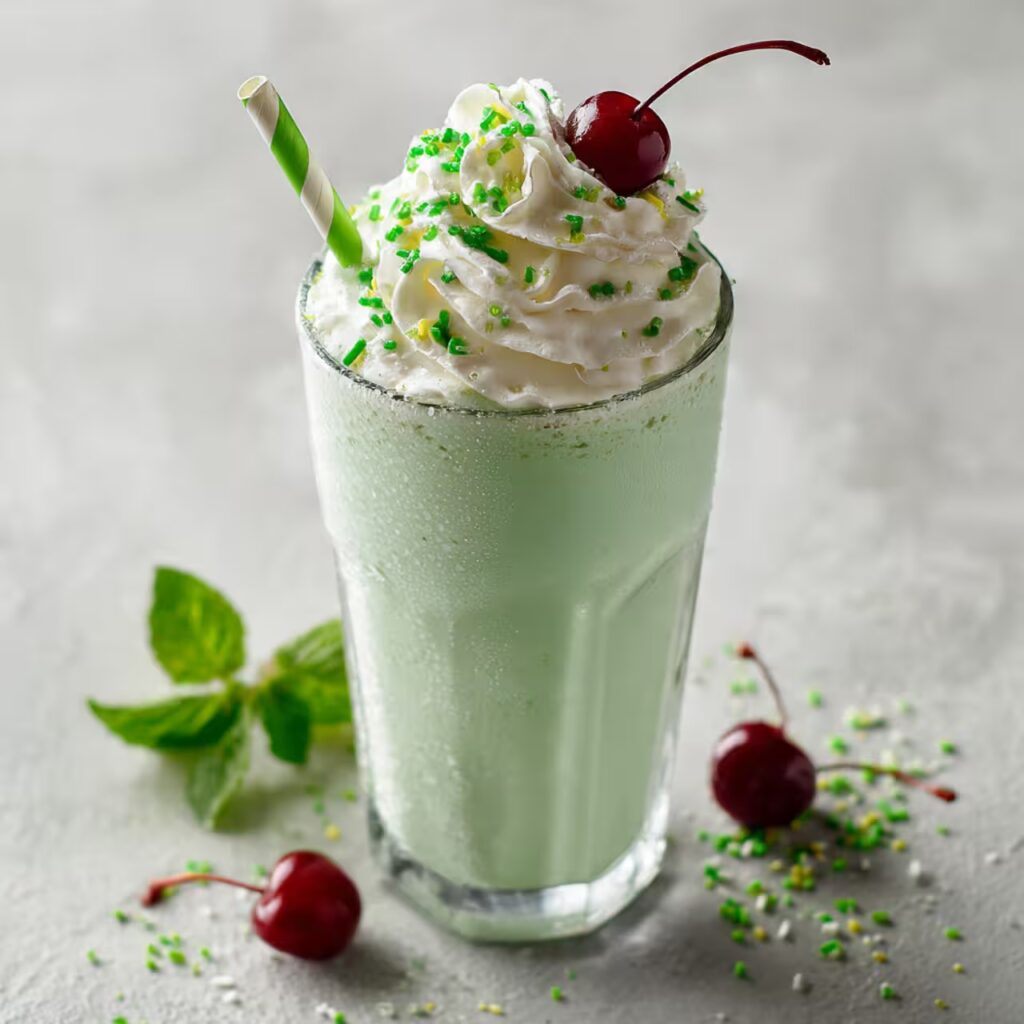
Table of Contents
The Story behind Homemade Shamrock Shake
Last March, while rain drummed against my Portland kitchen window, I found myself desperately craving something green, minty, and utterly comforting. Consequently, I decided to recreate that iconic shake we all know and love. However, instead of driving across town, I opened my freezer and spotted a carton of vanilla ice cream staring back at me.
That afternoon became a delightful experiment in my kitchen. Initially, I worried about getting the mint flavor just right, too little and it’s bland, too much and it’s overpowering. Nevertheless, after a few tries, I nailed the perfect Homemade Shamrock Shake recipe that actually tastes better than the original.
What struck me most was how the vibrant green color instantly lifted my spirits on that gray day. Furthermore, the creamy texture paired with that refreshing mint hit created exactly the comfort I was seeking. Since then, this Homemade Shamrock Shake has become my go-to treat whenever I need a little kitchen magic, and when I want a make-ahead dessert version for parties, Shamrock Shake Pudding Cups are always a crowd favorite too.
My kids now request it year-round, and honestly, who am I to deny them? After all, happiness shouldn’t be limited to just one season. This Homemade Shamrock Shake pairs beautifully with chocolate chip cookies or brownies. Moreover, serving it alongside Mint Oreo Bark creates an easy mint-and-chocolate dessert combo that works perfectly for St. Patrick’s Day parties, movie nights, or casual family celebrations.
Ingredients
Each ingredient in this Homemade Shamrock Shake plays a crucial role in creating that perfect creamy, minty experience:
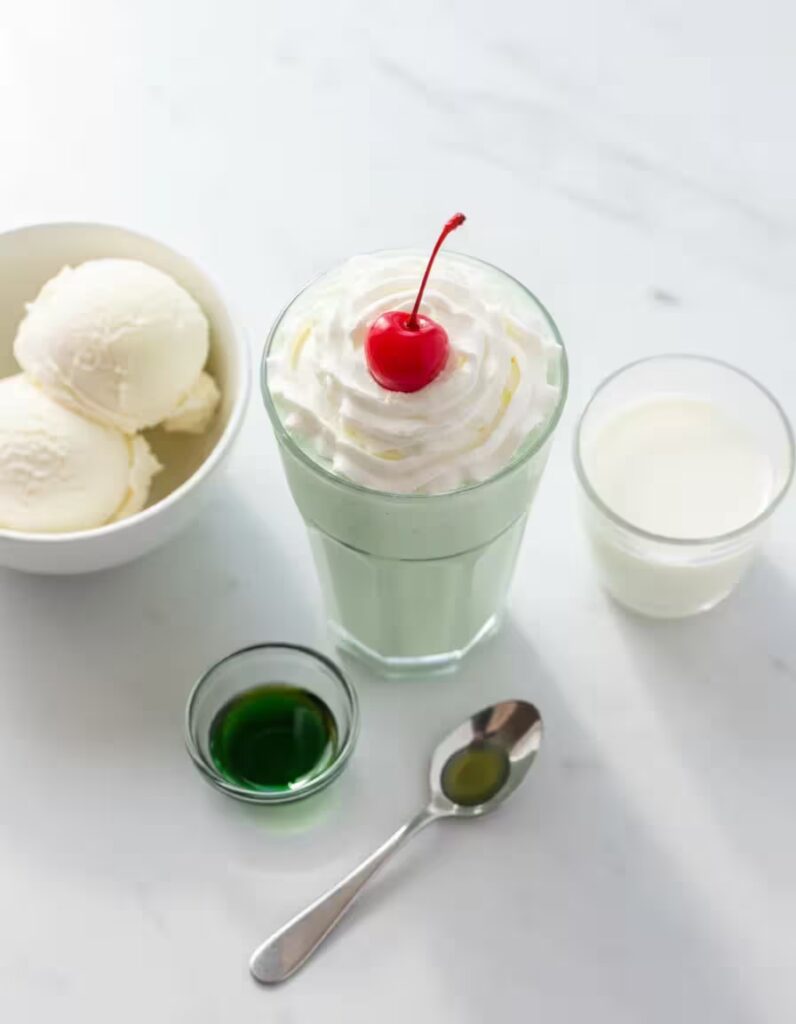
2 cups vanilla ice cream serves as our rich, creamy foundation. Additionally, vanilla ice cream provides the perfect neutral base that allows the mint flavor to shine without competing flavors.
¾ cup whole milk creates the ideal consistency for sipping. Furthermore, whole milk adds richness while thinning the ice cream to that perfect shake texture.
½ teaspoon mint extract delivers that signature refreshing flavor that makes a Shamrock Shake instantly recognizable. This precise amount gives you authentic mint taste without overwhelming your palate or turning the shake bitter. If you’re unsure about strength or substitutions, this guide on peppermint extract and how to use it properly explains the differences and helps you avoid common flavor mistakes.
4 drops green food coloring transforms your shake into that iconic emerald hue. Similarly, this small amount creates the visual appeal that makes this drink so special.
Whipped cream for topping adds an extra layer of indulgence. Moreover, it provides a beautiful contrast against the green shake below.
1 maraschino cherry for garnish completes the classic presentation. Finally, this sweet finishing touch makes your shake look professionally crafted.
Timing
| Task | Time Required |
|---|---|
| Preparation | 2 minutes |
| Blending | 3 minutes |
| Total Time | 5 minutes |
| Serves | 2 people |
This Homemade Shamrock Shake takes just 5 minutes from start to finish, that’s 75% faster than driving to your nearest fast-food restaurant! Additionally, you’ll have complete control over ingredient quality and flavor intensity.
Step-by-Step Instructions
Step 1: Create Your Base
Start by combining 2 cups of vanilla ice cream and ¾ cup of whole milk in your blender. Meanwhile, make sure your ice cream isn’t rock-hard from the freezer, let it soften for about 5 minutes if needed. This step creates the foundation that determines your shake’s final texture.
Step 2: Achieve Smooth Perfection
Blend until smooth and creamy, typically 30-45 seconds. However, don’t over-blend, as this can make your shake too thin. You’ll know it’s ready when the mixture moves freely but still maintains that thick, luxurious consistency.
Step 3: Add the Magic
Add ½ teaspoon of mint extract and 4 drops of green food coloring to your mixture. Furthermore, start with less food coloring, you can always add more, but you can’t take it away. This step transforms your ordinary vanilla shake into something extraordinary.
Step 4: Final Blend and Taste
Blend again until fully combined and evenly colored, about 15-20 seconds. Next, taste your creation and adjust the mint extract if needed. Some people prefer a stronger mint flavor, while others like it more subtle.
Step 5: Serve with Style
Pour the shake into two glasses, leaving room for toppings. Subsequently, top each glass generously with whipped cream. Finally, crown each Homemade Shamrock Shake with a maraschino cherry for that classic finishing touch.
Nutritional Information
| Nutrient | Per Serving |
|---|---|
| Calories | 285 |
| Fat | 16g |
| Carbohydrates | 32g |
| Protein | 6g |
| Sugar | 28g |
| Calcium | 20% DV |
This Homemade Shamrock Shake provides a good source of calcium and protein. Additionally, each serving contains about the same calories as a medium banana and a cup of whole milk combined.
Healthier Alternatives for the Recipe
Want to lighten up your Homemade Shamrock Shake without sacrificing taste? Try these smart swaps:
Replace vanilla ice cream with frozen yogurt or low-fat vanilla ice cream to reduce calories by 30%. Meanwhile, substitute whole milk with almond milk or oat milk for a dairy-free version.
For sugar-conscious folks, use sugar-free vanilla ice cream and skip the cherry. Furthermore, you can add a handful of fresh spinach for natural green color, you won’t taste it, but you’ll get extra nutrients!
Protein powder enthusiasts can add a scoop of vanilla protein powder. This modification transforms your treat into a post-workout recovery drink that still tastes amazing.
Serving Suggestions
This Homemade Shamrock Shake pairs beautifully with chocolate chip cookies or brownies. Moreover, serve it alongside Irish soda bread for a themed celebration.
For adult gatherings, add a splash of Irish cream or mint liqueur. Additionally, rim your glasses with crushed chocolate cookies for an extra special presentation.
Consider serving mini versions in shot glasses for parties. Furthermore, you can multiply the recipe easily for larger crowds, just blend in batches to avoid overworking your blender.
Common Mistakes to Avoid
Don’t use too much mint extract, it becomes medicinal-tasting quickly. Instead, start with less and gradually add more to taste. This approach prevents you from ruining an entire batch.
Avoid using ice instead of adjusting milk quantity. Ice dilutes the flavor and creates a watery texture rather than that creamy consistency we’re after.
Never skip the softening time for rock-hard ice cream. Otherwise, you’ll strain your blender and end up with chunks instead of smooth creaminess. Patience here pays off significantly.
Storing Tips for the Recipe
Unfortunately, this Homemade Shamrock Shake doesn’t store well due to its ice cream base. However, you can prepare ingredients in advance by measuring everything into separate containers.
If you have leftovers, pour them into popsicle molds for a fun frozen treat. Additionally, leftover shake can be stored in the refrigerator for up to 2 hours, but you’ll need to re-blend before serving.
For meal prep enthusiasts, consider making ice cream cubes by freezing portions of ice cream in ice cube trays. This method makes blending faster and more consistent.
Conclusion
This Homemade Shamrock Shake proves that restaurant favorites can be easily recreated at home with better ingredients and customizable flavors. You’ll save money, control quality, and impress family and friends with your culinary skills.
Ready to bring some minty magic to your kitchen? Grab your blender and give this recipe a try today! And if you’re building a full St. Patrick’s Day spread for kids or parties, Leprechaun Bait makes a fun, crunchy snack to serve right alongside this creamy shake.
Print
Homemade Shamrock Shake:
- Total Time: 5 minutes
- Yield: 2 servings 1x
- Diet: Vegetarian
Description
This Homemade Shamrock Shake delivers that cool minty flavor and creamy texture of the fast-food favorite, with better ingredients and ready in just 5 minutes!
Ingredients
- 2 cups vanilla ice cream
- 3/4 cup whole milk
- 1/2 teaspoon mint extract
- 4 drops green food coloring
- Whipped cream for topping
- 1 maraschino cherry for garnish
Instructions
1. Combine vanilla ice cream and whole milk in a blender.
2. Blend until smooth and creamy, about 30–45 seconds.
3. Add mint extract and green food coloring.
4. Blend again for 15–20 seconds until fully combined.
5. Taste and adjust mint if needed.
6. Pour into two glasses and top with whipped cream and a maraschino cherry.
Notes
- For a thicker shake, use less milk or more ice cream.
- Use spinach instead of food coloring for a natural green hue.
- Make it dairy-free with plant-based milk and ice cream.
- Freeze leftovers in popsicle molds for a fun twist.
- Prep Time: 2 minutes
- Cook Time: 3 minutes
- Category: Drinks
- Method: Blended
- Cuisine: American
Nutrition
- Serving Size: 1 glass
- Calories: 285
- Sugar: 28g
- Sodium: 90mg
- Fat: 16g
- Saturated Fat: 10g
- Unsaturated Fat: 4g
- Trans Fat: 0g
- Carbohydrates: 32g
- Fiber: 0g
- Protein: 6g
- Cholesterol: 45mg
FAQs
Can I make this Homemade Shamrock Shake without food coloring?
Absolutely! Your shake will taste identical without the green color. For natural coloring, try adding a handful of fresh spinach, you won’t taste it, but it’ll give you that green hue.
How can I make my shake thicker?
Use less milk or add more ice cream. Start with ½ cup milk instead of ¾ cup, then adjust as needed for your preferred consistency.
Can I use peppermint extract instead of mint extract?
Yes, but use half the amount since peppermint is stronger. Start with ¼ teaspoon and adjust to taste.
Is there a vegan version of this recipe?
Definitely! Use dairy-free ice cream and plant-based milk. Coconut milk ice cream works particularly well for maintaining that creamy texture.
How long does it take for the ice cream to soften?
About 5-10 minutes at room temperature, depending on how frozen it is. You want it soft enough to scoop easily but not melted.