
I’ll never forget the first time I made candied orange slices. It was during my third year running “The Cozy Fork,” and I’d just gotten my hands on a crate of gorgeous Valencia oranges from a local farmer. Now, being someone who hates waste more than burnt coffee, I couldn’t stand throwing away those beautiful peels. That’s when my grandma’s voice echoed in my head: “Sugar makes everything better, honey.”
Those first candied orange slices were a revelation. They transformed my humble food truck desserts into something that looked like it belonged in a fancy bakery window. I’d watch customers’ faces light up when they bit into these translucent, sweet-tangy gems that crowned our Classic Cherry Cheesecake. But here’s the thing, candied orange slices aren’t just garnish; they’re pure sunshine captured in sugar.
Since then, I’ve probably made thousands of these little beauties, and each batch reminds me why I fell in love with cooking in the first place. There’s something magical about watching ordinary orange slices transform into these jewel-like treats. Plus, making candied orange slices fills your kitchen with the most incredible citrus aroma – it’s better than any expensive candle.
The process itself is almost meditative. You start with fresh oranges, apply a little patience and sugar, and end up with something that tastes like childhood memories and looks like edible stained glass. Whether you’re looking to impress dinner guests or just want to treat yourself, these candied orange slices deliver every single time, especially when paired with cozy desserts like my Vegan Baked Cinnamon Apple Slices.
Ingredients You’ll Need
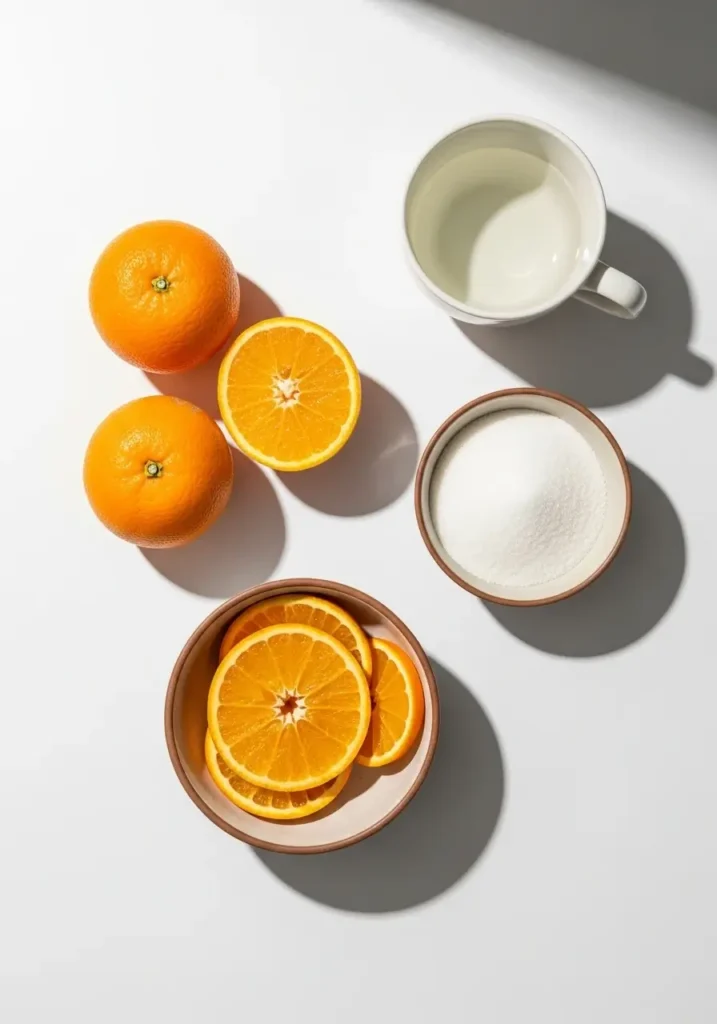
4 Fresh Oranges
The stars of our show! I prefer navel or Valencia oranges because they’re sweet, juicy, and have sturdy peels that hold up beautifully during the candying process. The natural oils in the peel create that incredible citrus perfume, while the flesh provides just enough tartness to balance the sweetness.
2 Cups Granulated Sugar
This is what transforms our orange slices from fresh fruit into candy magic. Granulated sugar dissolves evenly and creates that gorgeous, translucent finish we’re after. It also acts as a preservative, giving your candied orange slices a longer shelf life.
2 Cups Water
Pure, simple water helps create the syrup that infuses every fiber of the orange with sweetness. It’s the vehicle that carries all those beautiful flavors deep into the fruit.
1 Teaspoon Vanilla Extract
Here’s my secret weapon! Most traditional recipes skip this, but vanilla adds depth and warmth that makes these candied orange slices absolutely irresistible. It rounds out the citrus brightness with a subtle, comforting note.
Timing
Let’s talk real numbers here. This recipe takes 1 hour and 25 minutes total, but here’s the breakdown that’ll help you plan your day:
- Prep Time: 15 minutes for washing and slicing
- First Boil: 10 minutes to soften the oranges
- Syrup Making: 5 minutes to get that sugar mixture bubbling
- Candying Process: 60 minutes of gentle simmering
- Cooling Time: 30-45 minutes (not included in total time)
Compared to store-bought candied fruit that’s often tough and artificially flavored, this homemade version takes about 40% longer but delivers 100% better results. Trust me, once you taste the difference, you’ll never go back to the packaged stuff.
Step 1: Prepare Your Orange Slices
Start by giving those oranges a good wash, we’re using the whole slice, peel and all, so cleanliness matters. Then comes the fun part: slicing them into rounds about 0.25 inches thick. I like to use a sharp knife and take my time here. Consistency is key because evenly sized slices will candy at the same rate. Don’t forget to fish out any seeds as you go, nobody wants to bite into a bitter seed while enjoying their sweet treat!
Step 2: The Initial Boil
Fill a medium pot with water and bring the orange slices to a gentle boil. This step softens the peels and removes bitterness. After 10 minutes, your kitchen will smell like a citrus grove, one of my favorite aromas, right up there with roasting sweet potatoes from my Roasted Sweet Potato Goat Cheese Salad.
Step 3: Create the Magic Syrup
While your oranges are getting their spa treatment, grab another saucepan and combine the sugar, water, and vanilla extract. Heat this mixture over medium heat, stirring occasionally until the sugar completely dissolves and the mixture starts bubbling. You’ll know it’s ready when it looks crystal clear and has a light, syrupy consistency.
Step 4: The Transformation Begins
Here’s where patience pays off big time. Transfer your softened orange slices into that beautiful syrup and reduce the heat to low. For the next hour, these slices will slowly transform, becoming translucent and absorbing all those sweet, vanilla-kissed flavors. I like to give them a gentle stir every 15 minutes or so, just to make sure they’re all getting equal love.
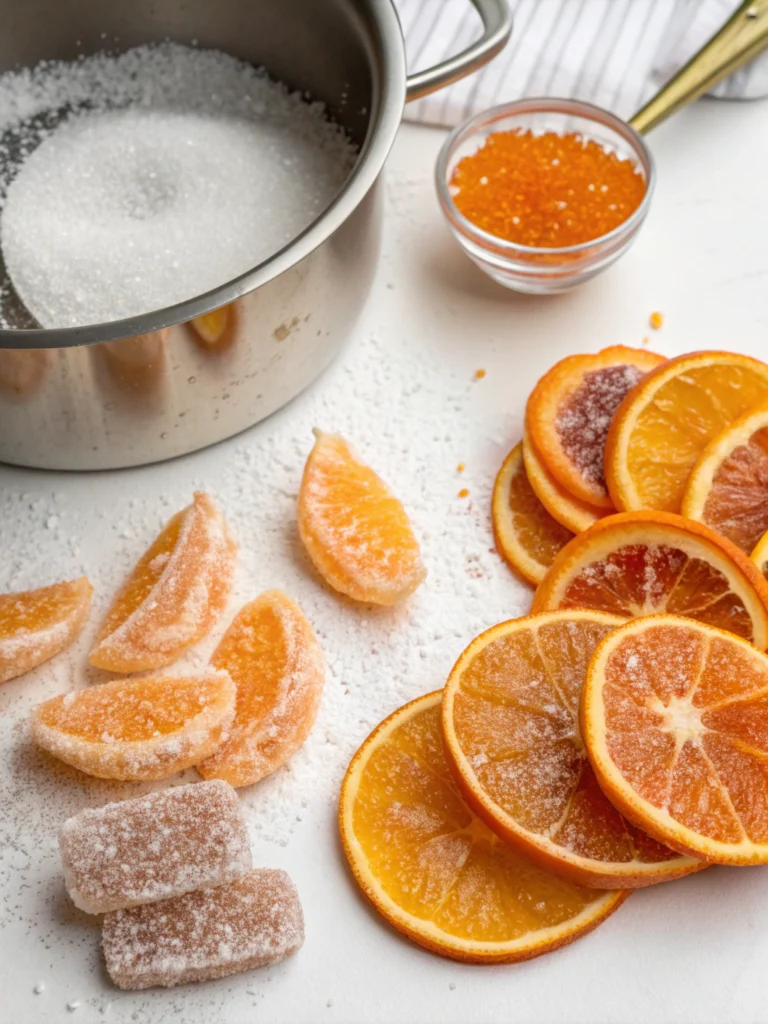
Step 5: The Final Rest
Once your orange slices look like beautiful amber gems, carefully remove them from the syrup and arrange them on parchment-lined baking sheets. Don’t overlap them, they need space to cool and set properly. This cooling process usually takes about 30-45 minutes, depending on your kitchen’s humidity.
Nutritional Information
Each serving of two candied orange slices (about 40g) contains approximately 105 calories, making them a relatively light treat. Here’s what you’re getting:
| Nutrient | Amount per Serving |
|---|---|
| Calories | 105 |
| Carbohydrates | 28g |
| Sugar | 26g |
| Fiber | 1g |
| Protein | 1g |
| Fat | 0g |
| Sodium | 0mg |
The beauty of these candied orange slices lies in what they don’t contain, no artificial preservatives, no high fructose corn syrup, and no mysterious additives. You’re also getting a small dose of vitamin C and fiber from the orange peel, plus those beneficial citrus oils that support digestion.
Healthier Alternatives for the Recipe
Want to lighten things up without sacrificing flavor? I’ve got you covered! You can substitute half the granulated sugar with coconut sugar for a lower glycemic option that adds subtle caramel notes. For those watching their sugar intake, try using a 1:1 sugar substitute like erythritol, though the texture will be slightly different.
Another fantastic option is adding a tablespoon of fresh ginger to your syrup. Not only does this create an amazing flavor combination, but ginger also brings anti-inflammatory benefits to the table. If you’re feeling adventurous, try replacing the vanilla with a cinnamon stick or a few cardamom pods for a warming spice twist.
For a truly unique variation, use blood oranges when they’re in season. They’ll give you gorgeous deep red candied slices with a slightly more complex flavor profile. Plus, blood oranges contain anthocyanins, the same antioxidants found in blueberries!
Serving Suggestions
These versatile beauties shine in so many ways! I love using them as a stunning garnish for chocolate tarts or vanilla panna cotta, they add that perfect pop of color and bright flavor that cuts through rich desserts. But don’t stop at desserts! Try them on a cheese board alongside aged cheddar or creamy brie for an unexpected sweet-savory combination.
During the holidays, I thread them onto cocktail picks for garnishing winter cocktails. They’re absolutely magical in an old-fashioned or a gin and tonic. For breakfast lovers, chop them up and fold them into pancake batter or yogurt parfaits. The possibilities are honestly endless.
One of my favorite serving tricks is to save that leftover syrup (don’t you dare throw it away!) and use it to sweeten iced tea or drizzle over vanilla ice cream. It’s liquid gold, I tell you!
Common Mistakes to Avoid
Let me save you from the mistakes I made when I was starting out. First, don’t rush the simmering process. I know an hour feels long, but high heat will make your orange slices tough instead of tender. Think of it like a gentle bath, not a rapid boil.
Another biggie? Overcrowding your pot. Give those orange slices room to move around in the syrup. When they’re packed too tightly, they won’t candy evenly, and you’ll end up with some perfectly translucent slices and others that are still opaque.
Also, resist the urge to stir too frequently. Gentle movements every 15 minutes are plenty, too much stirring can break apart your beautiful slices. Finally, make sure your cooling rack or parchment paper is completely clean and dry. Any moisture or grease will prevent proper setting.
Storing Tips for the Recipe
Proper storage is the secret to keeping your candied orange slices perfect for weeks. Once they’re completely cool and set, layer them between sheets of parchment paper in an airtight container. They’ll stay fresh at room temperature for up to 2 weeks, or you can refrigerate them for up to a month.
If you want to prep ahead for the holidays, these freeze beautifully! Wrap them well and freeze for up to 3 months. Just thaw them at room temperature when you’re ready to use them. Pro tip: if they seem a bit sticky after storage, just dust them lightly with granulated sugar.
For gift-giving, arrange them in pretty tins or glass jars. They make absolutely gorgeous homemade presents that show you really care. Just remember to include storage instructions for the lucky recipients!
Conclusion
Let me save you from the mistakes I made when I was starting out. First, don’t rush the simmering process. I know an hour feels long, but high heat will make your orange slices tough instead of tender. Think of it like a gentle bath, not a rapid boil, much like when you’re baking fruit in my Vegan Baked Cinnamon Apple Slices, where slow heat brings out the natural sweetness without drying things out.
Another biggie? Overcrowding your pot. Give those orange slices room to move around in the syrup. When they’re packed too tightly, they won’t candy evenly, and you’ll end up with some perfectly translucent slices and others that are still opaque.
Also, resist the urge to stir too frequently. Gentle movements every 15 minutes are plenty, too much stirring can break apart your beautiful slices. Finally, make sure your cooling rack or parchment paper is completely clean and dry. Any moisture or grease will prevent proper setting.
Print
Easy Candied Orange Slices Recipe
- Total Time: 1 hour 25 minutes
- Yield: 24 slices 1x
Description
These candied orange slices are sweet, tangy, and translucent with a hint of vanilla. Perfect for garnishes, gifts, or snacking.
Ingredients
- 4 fresh oranges (Valencia or Navel), sliced 1/4 inch thick
- 2 cups granulated sugar
- 2 cups water
- 1 teaspoon vanilla extract
Instructions
1. Wash and slice oranges into 1/4-inch rounds. Remove seeds.
2. Bring a pot of water to a boil and blanch the orange slices for 10 minutes. Drain.
3. In another pan, combine 2 cups sugar, 2 cups water, and vanilla extract. Heat until sugar dissolves and the mixture simmers.
4. Add orange slices to the syrup. Simmer on low for 60 minutes, stirring gently every 15 minutes.
5. Remove slices with tongs and place on parchment-lined sheet. Cool for 30–45 minutes.
6. Store in airtight container or refrigerate up to 1 month.
Notes
- Use blood oranges for dramatic color and flavor.
- Add a cinnamon stick or cardamom pod for spiced variation.
- Save leftover syrup to drizzle over ice cream or add to cocktails.
- For a sparkling finish, coat cooled slices in sugar before serving.
- Prep Time: 15 minutes
- Cook Time: 1 hour 10 minutes
- Category: Dessert
- Method: Stovetop
- Cuisine: American
Nutrition
- Serving Size: 2 slices
- Calories: 105
- Sugar: 26g
- Sodium: 0mg
- Fat: 0g
- Saturated Fat: 0g
- Unsaturated Fat: 0g
- Trans Fat: 0g
- Carbohydrates: 28g
- Fiber: 1g
- Protein: 1g
- Cholesterol: 0mg
FAQs
Can I use different types of oranges for this recipe?
Absolutely! While I prefer navel or Valencia oranges for their balanced sweetness and sturdy peels, you can use any variety. Blood oranges create stunning deep red slices, while Cara Cara oranges offer a slightly sweeter, more delicate flavor.
What should I do with the leftover syrup?
Don’t waste that liquid gold! The leftover syrup is perfect for sweetening cocktails, drizzling over pancakes, or mixing into sparkling water for a homemade citrus soda. Store it in the refrigerator for up to two weeks.
How do I know when the orange slices are properly candied?
Look for translucent, amber-colored slices that feel slightly firm but not tough. They should have absorbed most of the syrup’s sweetness while maintaining their shape. If they’re still opaque after an hour, give them another 15-20 minutes.
Can I make these without vanilla extract?
Yes, but the vanilla adds a wonderful depth of flavor that complements the citrus beautifully. If you prefer, substitute it with almond extract (use half the amount) or add spices like cinnamon or ginger to the syrup instead.
Why are my candied orange slices turning out tough?
This usually happens when the heat is too high during the candying process. Keep the temperature low and gentle, the syrup should barely bubble. Also, make sure you’re giving the oranges that initial 10-minute boil to soften them before adding them to the syrup.